Buh, there's some really misleading and confusing info in this thread.
Erik, your melts pop because you aren't securing them properly first. You can't rely on the strength of the melt at all!!!! (This means you have to come up with a creative way to take the forces off the ends of the thread)
Jerub, your intentions are right but I feel like that diagram you put up is going to really steer new stitchers in the wrong direction as your style (which I assume what you posted to be) is veeery different than the standard in a few VERY key respects.
That said, I think what you're doing is alot more helpful than detrimental.
tom, you should also make a diagram and post it. I had to stitch the final panel on one of my bags because it blew a stitch, and I didn't stitch in that way. I was just following the pattern that was previously stiched, or as closely as I could. I left the last side unstitched and then turned right side out and then did a blind stitch(i think) Anyway I think this thread is really useful, I think more diagrams with step by step instructions would be useful too. Reading step by step written instructions without pictures really confuses me Also, the thread I have seen in most of my bags seems to be some sort of polyester+cotton rope. Its not really thread, as it is a bit thicker and stronger.
Always Shreddin
James Erickson
Eugene Footbag Association (Orton, Nasty, Me)
w/ new additions (Casey, Alex, Eddie, and Shawnell)
"I contend we are both atheists, I just believe in one fewer god than you do. When you understand why you dismiss all the other possible gods, you will understand why I dismiss yours."
Hey Erik i also have trouble with seams sometimes. Mine look alot better than yours (sorry i dont mean to be harsh like that) but i dont know how Andrew (Eskimoe) gets his seams too look so awesome and neat. I get some tiny ripples sometimes i think.
I would suggest 3 stitch per side and really make sure they are all evenly spaced apart and each stitch is the same length as the others, and that they all follow a straight horizontal line.
ie. -- -- --
not having stitches sitting higher or lower than the horizontal you choose.
EDIT: bah i tried to make more of a diagram of stitches but it just gets all out of format.
I just got a whole load of little ultralight samples and some seems a little thicker. Also some is furrier on one side than others, but furry side out is favourite right ?
I have a friend who makes handmade shoes and he suggested using a template with the stiching wholes predrilled into it so you can mark out the holes with an ultrafine permanent marker. Seems like a good idea for consistant stitching, anyone do this ???
Hi All, I have made a couple video slide shows of a bag I just made a few days ago. I took many pictures through out the process and have some simple instructions included as well.
The links are in order, start at the top one then proceed.
Yeah, thankyou so much for this. It has made it all alot clearer and saved me about 30 more questions. Great work and thanks for documenting the process.
Thank you for appreciating my time. While this is the way I stitch bags, Others including a gentleman named Tom Mosher think I may be misleading future stitchers. I have yet to get a reply on what exactally it is, or where I went wrong in my thread. So, only use the information I supply as a "helpfull guide" and not as a standard. My opinion is, footbag stitching is an art and I am just here to help jumpstart others interested in stitching.
Good luck with your own work, and please, send me pm's with pics of your first or any bags you have made as a new stitcher..
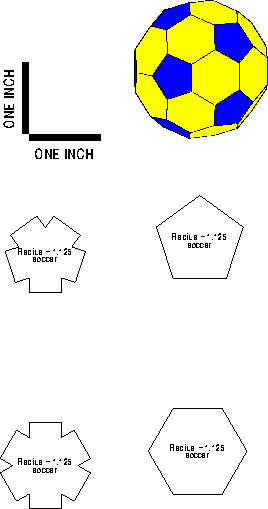
On that picture, as you can see, the hexagon has equal sides all around.
Is one way better than the other? Also, where would I be able to find a printable pattern in the style that you use where the hexagon has three larger sides and three smaller sides?
Secondly, how did you measure for the stitching holes? Every milimeter? Or is it a custom measurement?
I had used that pattern before, the difference is all sides are stitched and you will not have bleed holes. That bag takes a long time to sew and get right in my opinion... Only some of my instructions here will apply to that bag. I personally did not like the results I got using that pattern, you can give it a try though.
I would use the pattern generator here on modified. I use this one here http://modified.in/footbag/viewtopic.ph ... el+pattern, just follow the instructions to print
I used a quilt square to measure, 1/8 inch apart, 1/8 inch from edge for the stitch dots. These are not required but help new stitchers get even stitches. Spyder had a good Idea to simply drill the holes in your template to save time. I would only do that if you make your template from plastic. I am gonna try that myself. Also, I like stitch dots cause they help with roundness of the finished product.
Thanks very much for the timely reply. You have a good thing going here with this thread and all of the slideshows/pictures.
Question on that link you posted... is the pattern you use the one that was pictured and needed to be re-sized to 27% in Word? That is the one that I just sized and printed out to use, but I wanted to be sure.
Mark, your best bet for 32 panels is to go to http://patterns.phasing.org, its a 32 panel template generator by Mike the whizz kid. Its totally adjustable so you can make your own sizes and stuff, its extremely cool.